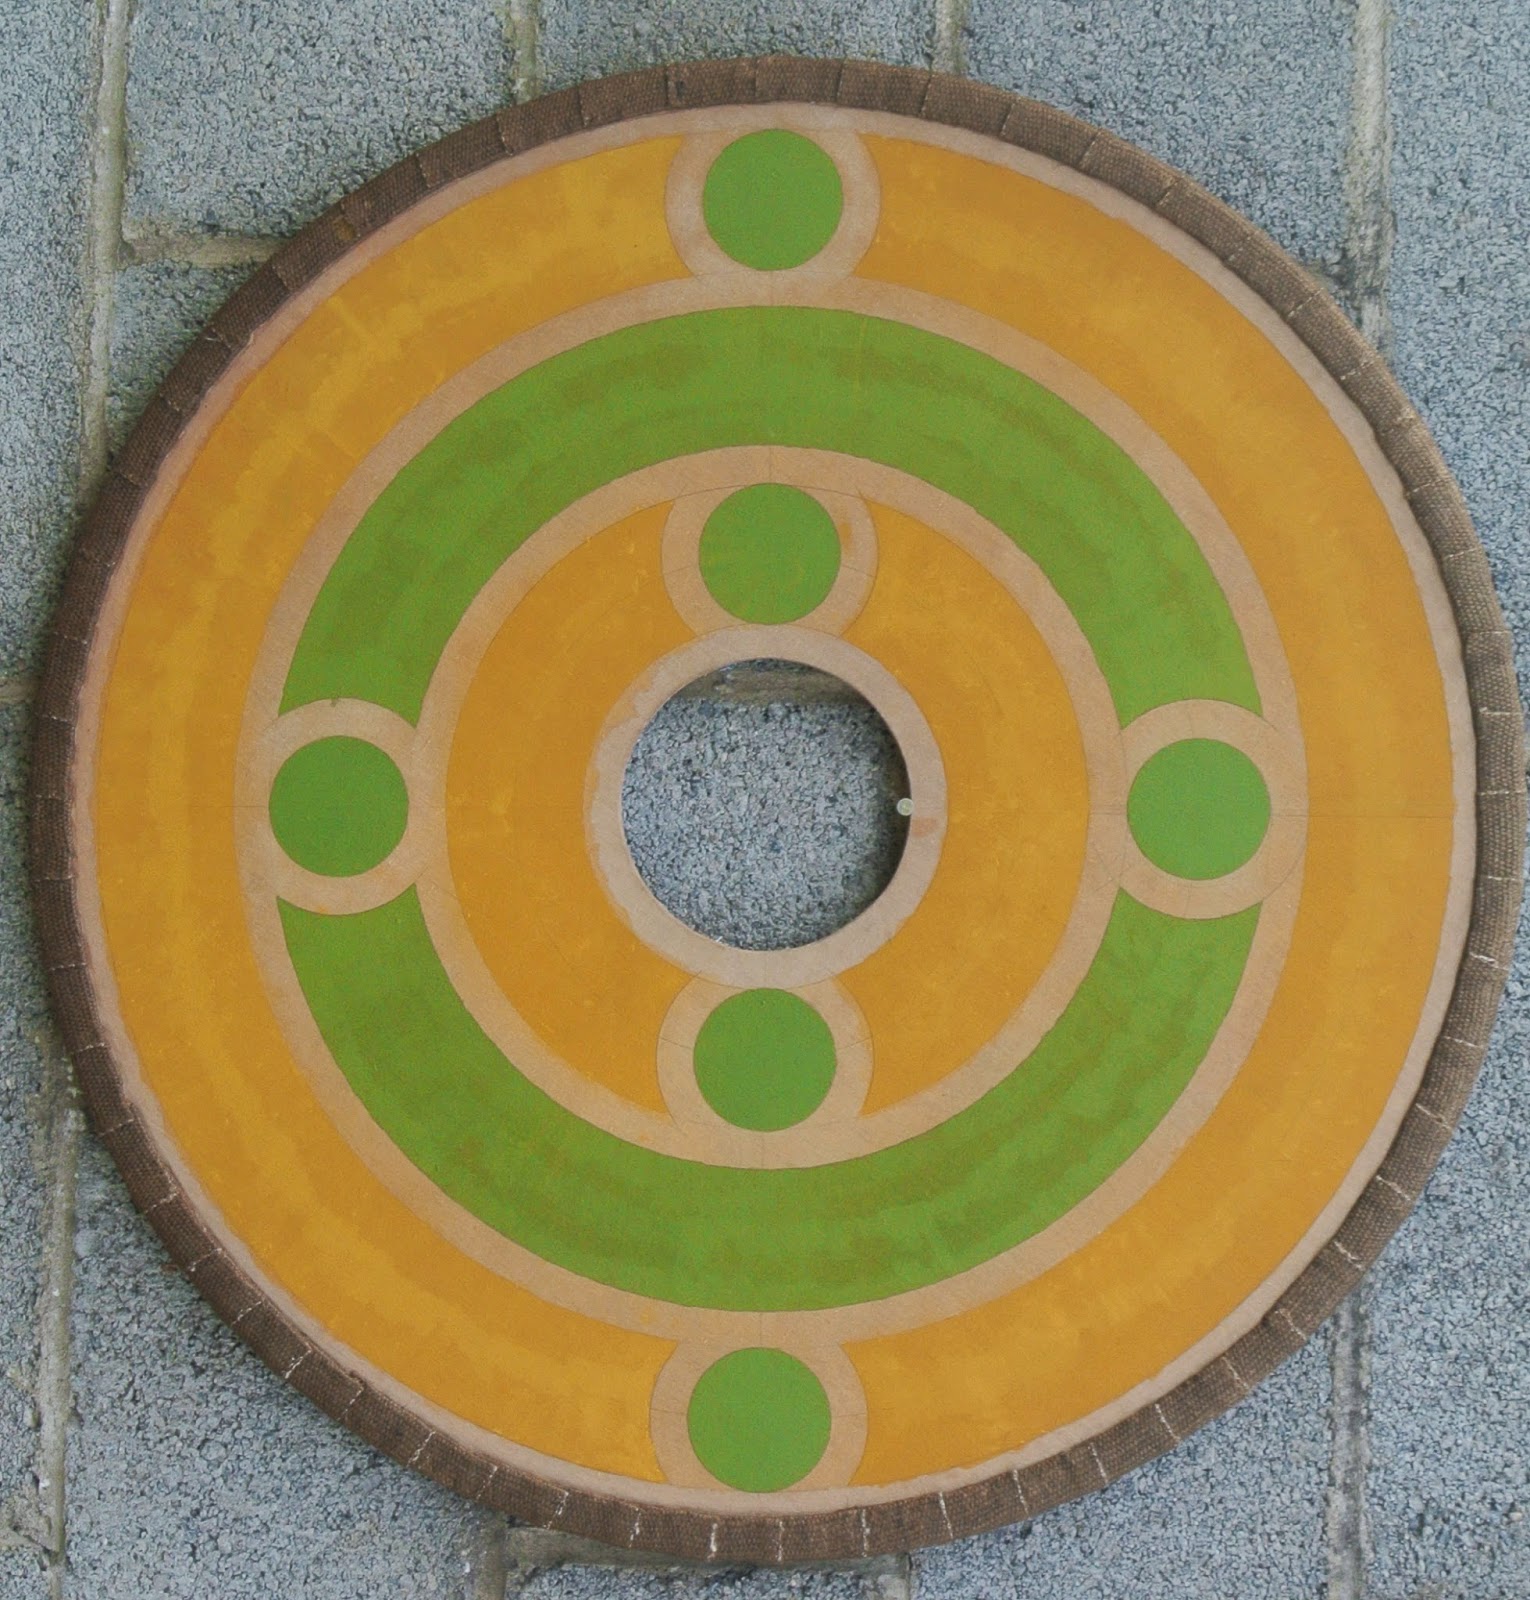
Second Viking shield FINISHED
I am glad
to say that I have finished my second Viking shield and it turned out quite
good. Typical of me, that I am not 100% happy with it, but then again I never
am happy with my work. But that's me in a nut shell I suppose.

So this
is the finished Viking shield, that has been aged and ready to be hung on the
wall.
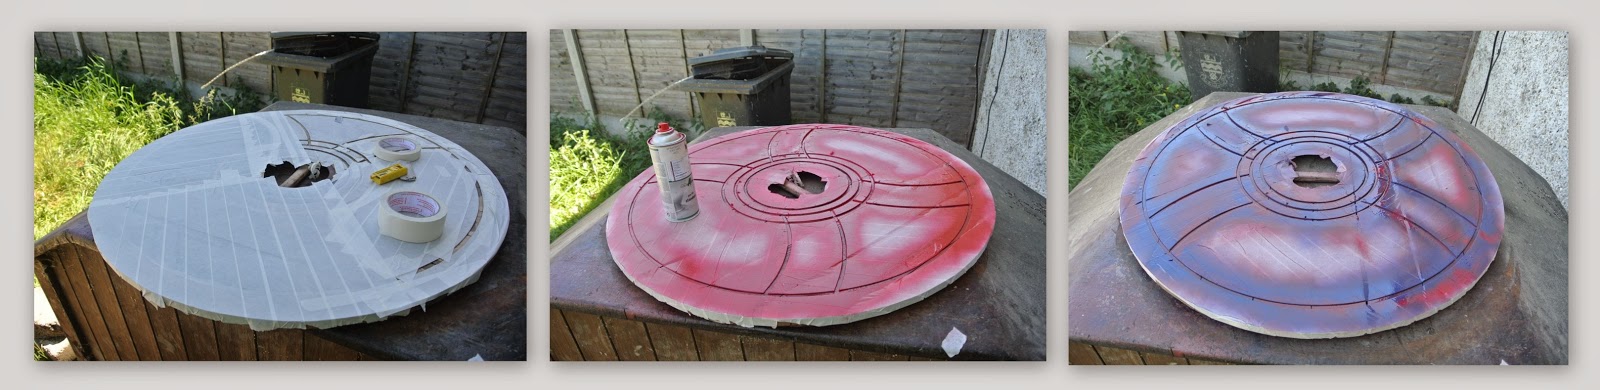
It took
me ages to paint the design and when it was almost finished I realised it
looked more Roman than Viking. I then looked at a few books on my bookshelf and
decided that a few Celtic designs from the Book of Kells would look good in the
medallions and I am hoping that it looks more Viking now.

I used
natural earth colours like burnt umber and yellow ochre as these colours would
have been available a thousand years ago. The green colour was made up with
yellow ochre and some copper oxide. Once I was reasonably happy with the
painting, I then aged it and put a few coats of wax over it all. There is a slight
brown colour to the wax which gives it a rough antique finish which is what I
was looking for.

I then
pined and nailed the boss on to the shield before putting the handle on the
back. I decided to pad the boss with some of the jute webbing as I feel this
gives it the look and feel of a real usable Viking shield. This shield was
however made and designed as an art piece, but I am confident enough that it
would work well as a re-enactment Viking shield, although I am sure it would
get destroyed in battle.
Over all,
I am happy with this project and am fighting the urge to build another few
shields. I think my next project will be to finish a self portrait piece that I
made when I was in college a few years ago. The portrait is called Evidence and
although I got a distinction for it, I never got round to putting a few final finishing
touches to the piece.
So until
next time, thank you for reading my blog and please comment if you wish.


.jpg)