Sunday, 6 July 2014

Viking Shield part 2

Viking Shield part 2


As I was saying in my last post, I put together the shield, laid down some basic designs, gave it a good sanding and now I am almost ready to finish the project.

I then put a new coat of the iron oxide vinegar mix and aloud it to dry and then put one more application to some of the inside panels to make them stand out more.


Once everything had dried out, I then decided to put some colour into the decoration lines. I felt the best way to do this was to mask everything off and then use some blood red spray paint I had. I really thought this would work until I ran out of the red, but I did have a small can of blue, so I kind of mixed everything up. I know that this isn’t what the Vikings would do, but as it was my contemporary version of a shield, I feel it will look ok.
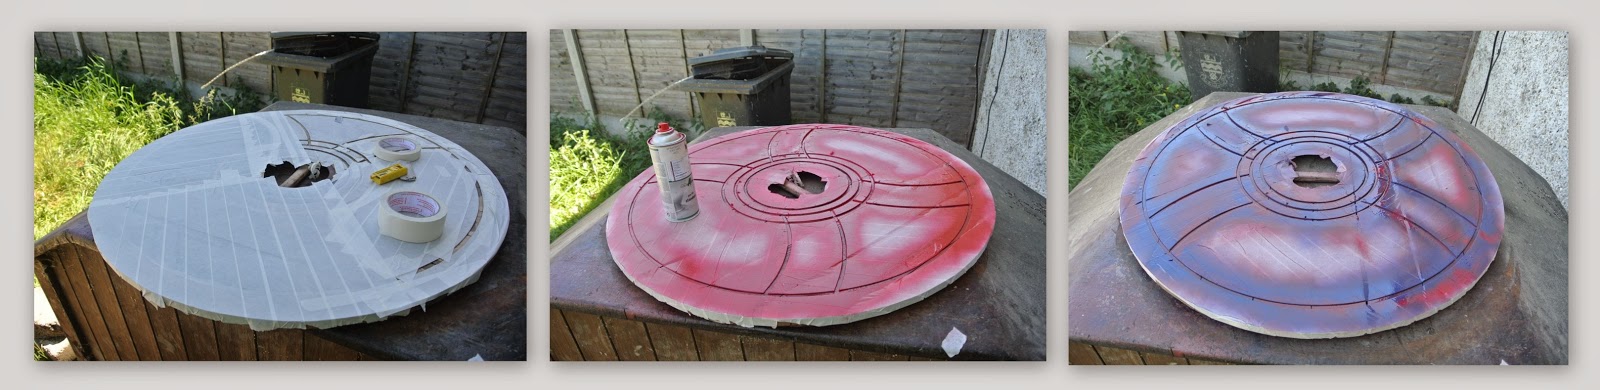


After the paint affect was done, I then gave the whole thing a coat of finishing wax and the shield was almost complete. The only thing left to do was the edging. I found out that shields had a raw hide edge that was sowed or nailed on while it was still wet and flexible. As the raw hide dried out, it became taught and really hard and tough.
The only raw hide I could find was from a pet shop and although this would have been ideal, it was just way to expensive as I needed 10 or 12 and they were about €4 each.
Instead of using raw hide I decided to buy a roll of jute webbing as used in upholstery. I sourced some on Amazon.co.uk and had this within a few days. It cost about €15 for 33m, which is a fantastic price and although I only needed about 3m, I will use it for other projects.


I first of all used a staple gun to fix the jute webbing and then drilled holes all around the shield. I then used jute twine to sow the webbing onto the shield and when this was finished, I removed all the staples. I used the jute twine on the grip or handle of the shield and then wiped the iron oxide mix into all the jute, which made it look old.


So this is the finished shield. To be honest, it doesn’t look as good as the blind carving when used as a wall hanging, but I will find a place to hang it some were in the house.


I have got to say I have enjoyed doing these projects and look forward to doing a few more. I really would love to have a small workshop so I could do some complex work and maybe start cabinetmaking again.

Once again, thank you for reading my blog and please feel free to comment if you wish.

Saturday, 28 June 2014

Viking Shield part 1


Viking Shield part 1


I was up in my loft again and found some more timber that came from a wooden pallet about ten years ago. It is the same wood that I made my blind carving of the old Irish Florin. Here is a photo of the blind carving Old Irish Florin.


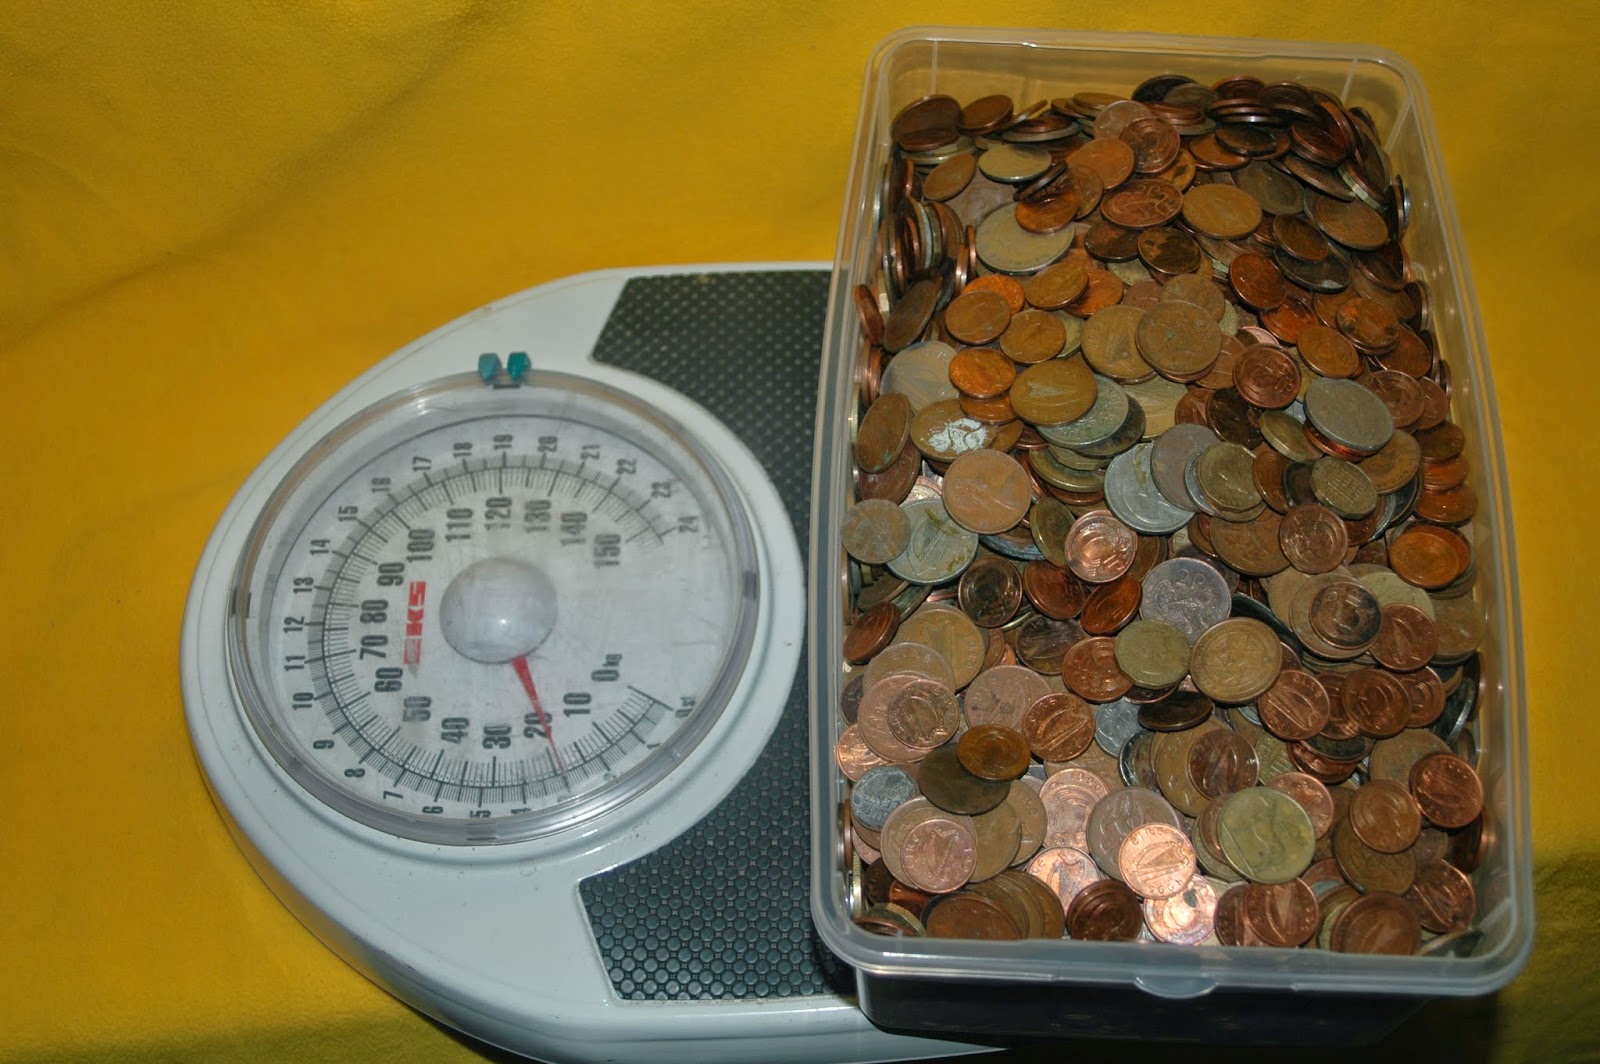
So I took the timber down and decided to do another project. About 1998 I had this idea about making a shield out of Irish 1 pennies and I collected a large 5lt tin of them, but never got round to using them yet.  Here is a photo of the coins. As you can see, there is almost 20kg of them. I will use them some time, but I don't think I will make them into a shield.


After a lot of thought and loads of research, I decided to use the timber to make a Viking style shield.  The wood was all warped and split, but as with the blind carving, I think this will add to the over all look.  To a degree I used the blind carving as a template as the shield is almost the same size.


So after I joined the wood together, I made two shield bosses as I wasn't sure which style I wanted. In this photo I show the two shield bosses placed on my blind carving which is on top of the joined wood for the shield. This gave me an idea which boss would suit the project. In case you are not sure, a shield boss is a steel dome that is designed to protect the hand in the handle of the shield.


So I cut the shield to the size I wanted and then started think about the design. I came up with a nice Viking style design, but decided that I would design it as I was making it. I felt that this approach would be more fluid and also how the Vikings would have made it.  In fact I didn't even use a ruler or any measurements, but did it all freehand, with a straight edge and string.


So here is the shield, put together with a coat of iron oxide vinegar, that will stain the wood. As you can see, the iron oxide has turned it a nice red hue.


After it dried, I started to put some designs down and gave it a good sanding. 
 The next post will be how I finished my shield project.

Please feel free to comment

Tuesday, 20 May 2014

Blind Carving part 4. New sculptural wood carving from a wooden pallet. Finished


Blind Carving part 4.   Finished 

New sculptural wood carving made from a wooden pallet 


Finished with clear wax


 Brown wax makes it look less grey and warmer


The finished blind carving, hung on my kitchen wall.

This is the finished blind carving that I made from an old wooden pallet.
As you can see it turned out OK considering how bad the wood was. All the sections married up and they match well, which was a surprise as each piece was carved blind from each other.
You can also see how the wood reacted with the iron oxide vinegar mix and also how the brown wax made it look warmer.

Now its time to plan another project, so if anyone has any suggestions, please feel free to leave in the comments.


Blind Carving part 3. New sculptural wood carving from a wooden pallet


Blind Carving part 3.  

New sculptural wood carving from a wooden pallet


I am glad to say that I got the blind carving project finished, and considering the materials and tools I used, I am very happy with it. Before I go any further into describing how I finished the project, I would like to show you some of the carving tools I used and also ones that I just could not find at the time.


I went up into the loft today and found some of my carving chisels, the ones I didn’t use on this piece. I do have a few more, but sill need to locate them.
These are two Ashley Iles chisels that I bought when I was still an apprentice in 1989. They cost me, I think, about £18-£22 each, which works out at €22.86-€27.94 in Euros. When I bought them, they were reasonably priced at the time and I also got a trade discount from the tool shop I bought them in. They are fantastic chisels and came already sharpened, honed and ready to use. They also keep sharp when in use.


Now in comparison, this is a full set of 12 carving chisels that I bought in Lidl in 2012. They cost me €16 for the whole set which is an average on €1.34 each as compared to between €22.86-€27.94 for just one chisel. In many ways it seems a no brainer that the Lidl woodcarving chisels I bought a few years ago are good value, which indeed they are. But I have already spent about 7 or 8 hours, grinding, sharpening and honing them, and even with all that time I still haven’t been able to get them even a fraction as sharp as the Ashley Ilse chisels. When I can get them sharp, they just don’t hold a keen edge as the tool steal is too soft. In saying that, they are an OK starter set for anyone that is willing to put the work into grinding, sharpening and honing.


So back to the blind carving project.

I was able to get the nine sections of the coin finished and as I did each piece, I stained them with the iron oxide, vinegar mix. 


I then put a coat of wax on as each piece dried and am glad to say it looks OK.
As all the sections are separate pieces, I had to join them up together. I used MDF flooring to make a back and used hot melt glue to stick the carving on it. Although it made the carving sturdy, it also made it very heavy and I think the weight would have been too much to hang it on a normal domestic wall. I decided to take the MDF off and use an old curtain liner as a backing. So I cut the curtain liner into strips and then glued and stapled it to the back of the carving. Once this had dried, I then glued the rest of the liner over the whole back, which covered the staples and made it all look neater. I then put some picture hanging wire on the back and it was almost finished and ready to hang on the wall.
I felt that the carving looked a bit grey, so I put some brown wax on and buffed it off when it dried. To be honest, I now feel that it may have looked better before the brown wax went on, although the brown does make the finished piece look warmer.


So this is the finished piece that was made out of a wooden pallet.
I know it is not perfect, but I do think the imperfections add to overall look. As you can see, not all the pieces match up and some of the wood has started to warp and crack. I have to say I am very happy with it and for the first time since 1997, I feel like doing wood carving again. The reason I say 1997 is because that is when I made my first and up until now, my last carving. Now that's another story that I will talk about some day, and the reason my good carving chisels were in my loft.


Thank you for reading my blog and please feel free to make a comment if you wish.


Sunday, 18 May 2014

Blind Carving part 2 New sculptural wood carving from a wooden pallet


Blind Carving part 2     New sculptural wood carving from a wooden pallet


So I worked out that I would be able to do the whole carving using 9 lengths of the wooden pallet. This would give me a good amount of wood to make my coin a nice big size. As it was going to be a blind carving, each piece will look different and it may not even match with the other pieces, which I think will look good as I am sure the wood is going to warp and crack. The other thing about this piece is I am not using my good carving chisels, but using some really cheep ones that cost €16 from Lidl. In truth, I only bought them because they were €16 for the full set from Lidl. They look really good, but it is almost impossible to sharpen them as the blade steel is way too soft and also they had to be ground down which took about 7 hours or more. I also used my normal chisels and a small Bosch router that I bought years ago. The router is fantastic to get rid of the bulk of the waste.


I took the piece of wood off and carved the section. When I was finished I put the wood back but found this to be tedious, so I started doing each piece and laying them to each other as you can see in the last photo.


Soon the carving came together and it was almost finished. Once I finished each piece, I stained it with a mixture of vinegar and steel wool that dissolved in the acid of the vinegar. This mixture will react to the tannins in the wood and make it darker, depending on the wood itself. As you can see, one of the sections went a dark blue gray colour.


So this is it almost finished. You can see some of the places the nails and tacks were, and how the vinegar mix reacts with the tanins in the wood and leaves it looking darker. Each piece is slightly different and they don’t fully match up, which is kind of what I wanted. So the next post, I will show how I will finish the sculpture.


Thursday, 15 May 2014

Blind Carving part 1 New Sculptural Wood Carving


Blind Carving part 1     New sculptural wood carving from a wooden pallet


When I moved into my new house over 10 years ago, the builders had left a wooden pallet in the back garden. At the time I was still a cabinetmaker and me being me, I just couldn’t let the timber go to waist. I took the pallet apart and all the good timber, or at least what looked good at the time, I put up in the loft for a possible future project. Now over ten years later, I have finally decided to do something with all that timber. So I have taken all the wood down form my loft and I have got to say, the timber is not very good at all. Over the years it has dried out, cracked and warped, but I think I will use the roughness of the timber as part of the sculpture.

 So I have been thinking about making myself a Celtic shield for about 15 years and was even going to make it out of old copper pennies, and that got me thinking about Irish coins. So I have decided to make my wood into a giant coin that I can hang on the wall. The coin I have chosen is the old pre. decimalisation Florin which became the Irish 10p when we joined the EEC.

So this is the coin I will try and make from my very rough timber.


This is the timber that I have laid out and I have decided to do the work very rough as this will reflect how bad the wood is and also, the truth is I cant find my wood carving chisels as they are stored in the loft and to be honest, there is so much stuff up there, it would take me ages to find them. I also think that doing it in a rough way, will make it look old and hopefully will suit the wood I am using.


So this is how I will carve it and it will be in nine sections. I am going to blind carve each length. When I say blind carve, I mean that I will carve each length independent from the other, so the sections may not even match each other. Hopefully this will look good and the imperfections will reflect the warped and cracked wood I am using.


So this is the timber tacked together with Rocky2 my boxer dog in the foreground to give scale.


So to work I will go and I will update my progress as I go.


Thursday, 6 March 2014

The confessions of my new art project

The confessions of my new art project

       It has been so long since I have updated this blog. It almost feels like going into the confessional box and telling the priest "bless me father for I have sinned. it has been 9 years since my last confession". I think any one that has a catholic upbringing will know what that is like LOL.
        By the way I am not at all religious, but I would be spiritual (if that makes since). But for anyone that is not of the catholic faith, which by the way includes me, the confession is a very sacred sacrament and it is when you go in and confess your sins and cleanse your sole. In a way its the psychiatrist of the catholic world, but instead of getting a pill to heal your wows, you have to say penance and mend your ways. I remember as a young boy , the priest started laughing at the innocence of my sins and it was kind of nice the he showed such a human side. Now I still had to say a few prayers, but it was clear I wasn't a bad kid at the time.
       So it has been over a year since this blog was updated. Still haven't got a job although I have to say, things are starting to look brighter on the job front and I am sure I will get a new job this year.
       SO what have I been doing for the last year?  Well I did a 9 month computer course and got a few qualifications on becoming a computer technician. I learned a lot about how to fix, build, maintain, set up and service computers and small servers. However, I have not been able to get a job as I just do not have experience. Its kind of a catch 22 situation. But the one thing I learned more than any thing else, while doing the computer technician course, was that I really don't think it is a job for me. Don't get me wrong, if I was offered a job in computers, I would snap it up straight away and as with all jobs I did in the past, I would throw myself into the work and do my very best. The only thing about being a computer technician is I feel it is not a creative job and my artistic side would suffer. But earning money, paying taxes and making a contribution to society instead of being on the dole, is something that a normal citizen should do and I feel bad that I'm not.
       As for art? to be honest I haven't done that much over the last year, although I do get the craving and my head is full of projects and ideas. I so want to do a few projects, but the life just seems to get in the way.


       I have however completed one prototype project this year, when I carved a Celtic cross in stone. I used my Record engraver for the first time, that I purchased 3 years ago, and have to say it turned out very well. I made it to look like it is very old and weathered looking. Allot of work went into it and I am very happy how it turned out.
       The stone I used came from a beech down in Co. Kerry and I have had this stone for over ten years as it was I kept it as a memento from when my friend got married in Glennbay in 1998. I always knew I would use the stone in an art project, even though I was still doing cabinetmaking at the time.
       Anyway, here is my stone Celtic cross. I decided not to put any real detail or Celtic knot work in this cross, as I wanted it to look primitive and also, I just think the stone is way to small and would just crumble if the detail was to fine. I am happy as it looks very old and weathered. I hope you all like it. I'd just like to point out that all the lines are straight and angels are correct(although the photo makes it look off) however the stone isnt. 


The reason I say this is a prototype, is because I want to carve a stone, with the names of family that are buried in KillyDonnell, back home in Ramelton Co.Donegal. We have a family grave that holds 12 of my ancestors and I would like there names to be on the grave. There is a large stone Celtic cross, but I don't think it would look good to have the names carved on it. I was thinking of taking a stone from the old family home and carve the names on it. I think this would be a nice tribute to everyone who is buried in the grave.
I will update you, when I start the project. However I am not sure when I will be back home in Donegal as I was only home once last year.
So until next time, thank you for reading my blog and any feed back is always welcome. Good or bad.