Wednesday, 30 July 2014

Second Viking shield FINISHED


Second Viking shield FINISHED

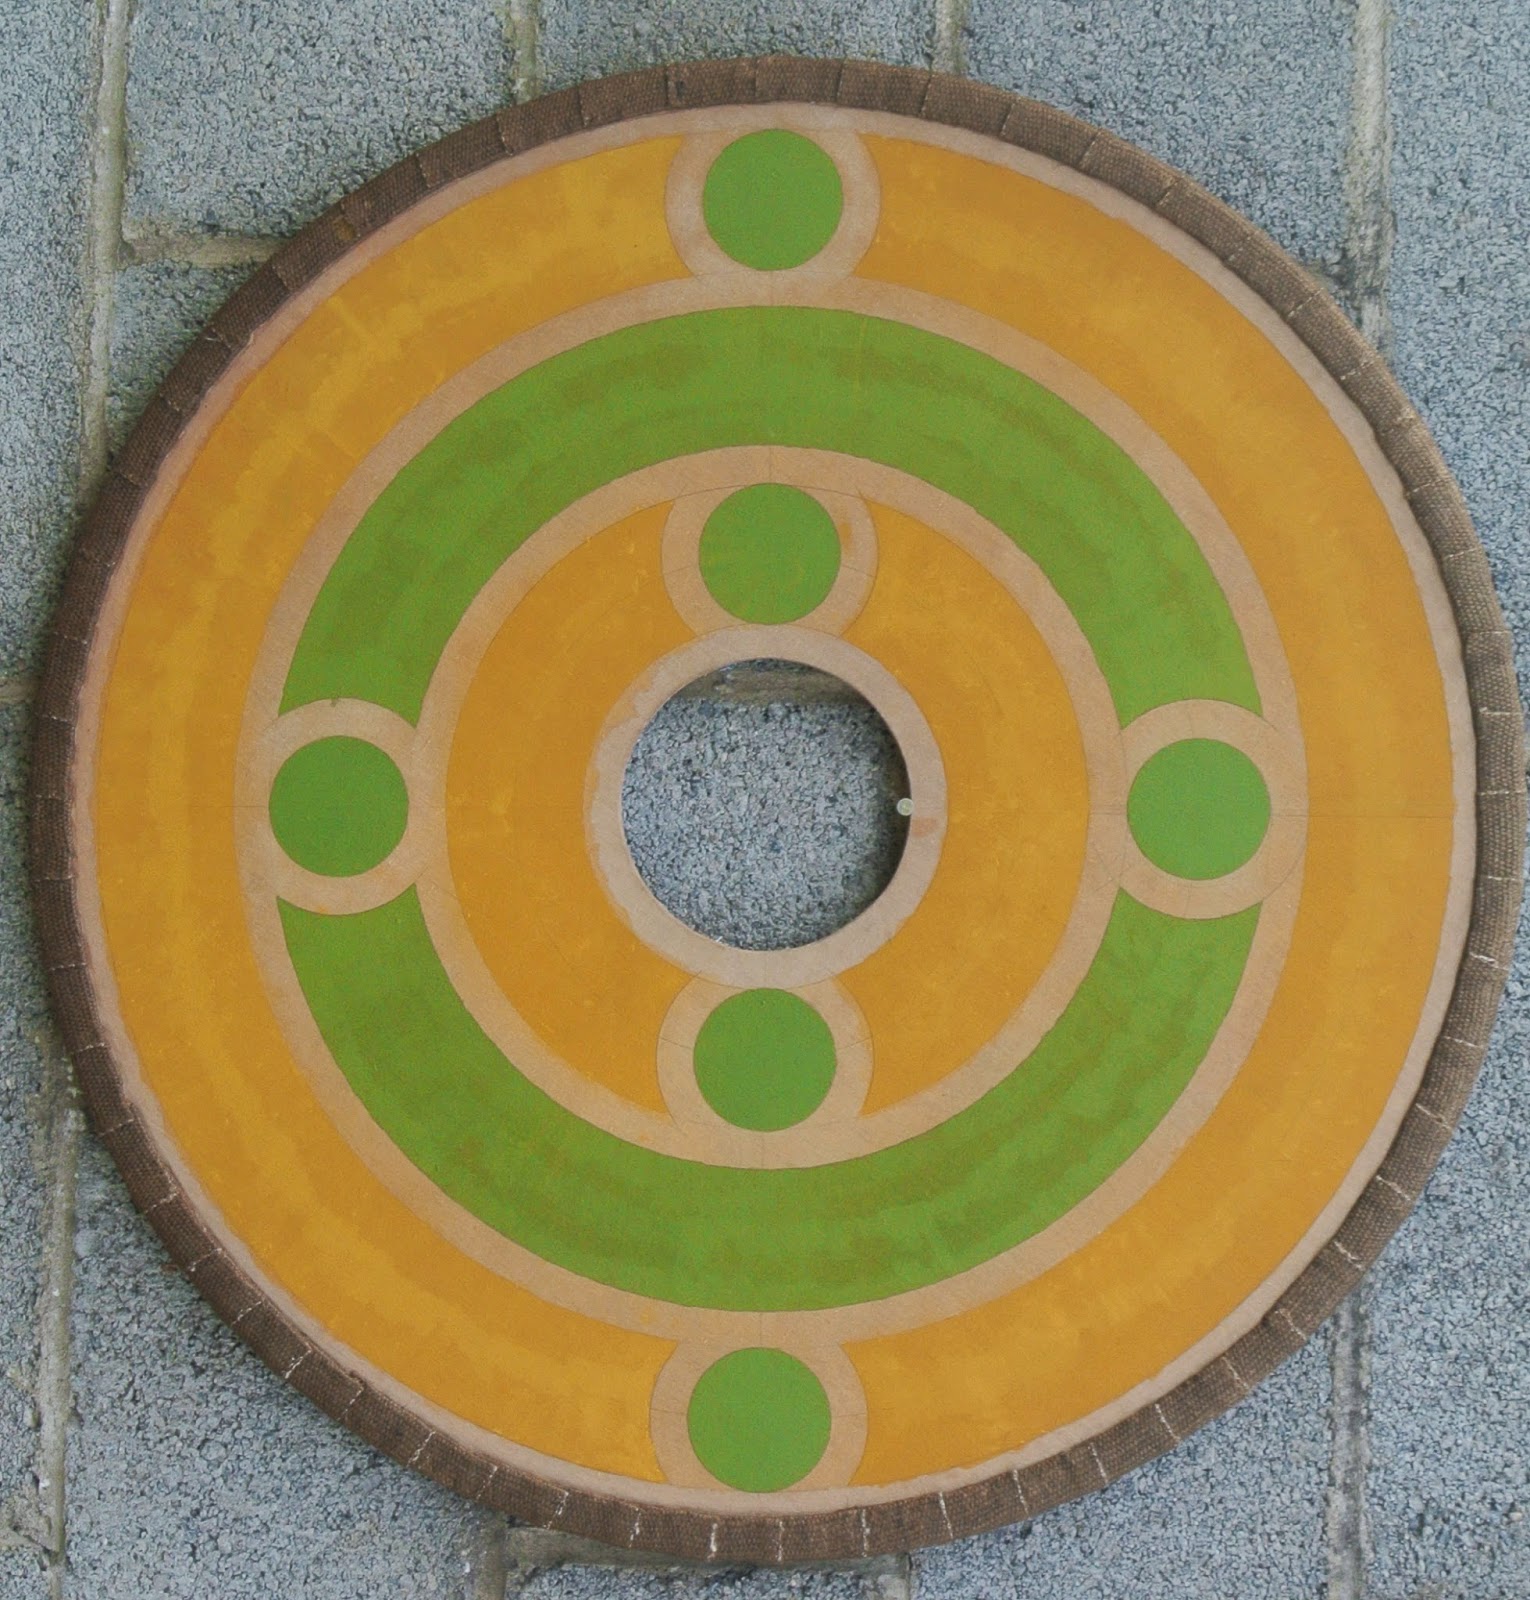
I am glad to say that I have finished my second Viking shield and it turned out quite good. Typical of me, that I am not 100% happy with it, but then again I never am happy with my work. But that's me in a nut shell I suppose.


So this is the finished Viking shield, that has been aged and ready to be hung on the wall.

It took me ages to paint the design and when it was almost finished I realised it looked more Roman than Viking. I then looked at a few books on my bookshelf and decided that a few Celtic designs from the Book of Kells would look good in the medallions and I am hoping that it looks more Viking now.


I used natural earth colours like burnt umber and yellow ochre as these colours would have been available a thousand years ago. The green colour was made up with yellow ochre and some copper oxide. Once I was reasonably happy with the painting, I then aged it and put a few coats of wax over it all. There is a slight brown colour to the wax which gives it a rough antique finish which is what I was looking for.


I then pined and nailed the boss on to the shield before putting the handle on the back. I decided to pad the boss with some of the jute webbing as I feel this gives it the look and feel of a real usable Viking shield. This shield was however made and designed as an art piece, but I am confident enough that it would work well as a re-enactment Viking shield, although I am sure it would get destroyed in battle.


Over all, I am happy with this project and am fighting the urge to build another few shields. I think my next project will be to finish a self portrait piece that I made when I was in college a few years ago. The portrait is called Evidence and although I got a distinction for it, I never got round to putting a few final finishing touches to the piece.


So until next time, thank you for reading my blog and please comment if you wish.

Sunday, 20 July 2014

Second Viking shield part 1


Second Viking shield part 1


After finishing my first Viking shield art project, I decided to make another one as I had found more timber up in my loft. So I started building it, but then realised I just did not have enough wood. As you may remember, this timber was used for the blind carving and my Viking shield. It came from a large industrial pallet that I took apart and put up in my loft over ten years ago.  The timber was warped, cracked and really rough, but I always knew I would use it for something other than cutting it up for firewood. 


Anyway, as I was saying, after starting to second shield, I now find I just do not have enough wood and also some it is just not usable. So I went down to the nearest DIY store and bought the cheapest cladding wood I could find and now have enough to also make a third shield as well.  As this new shield will be covered in canvas or linen and painted, as some original Viking shields would have been made, I went down to the local curtain shop and bought some large curtain liner cloth as this will do the job at a fraction of the cost, as linen and canvas is expensive. When the Vikings made this kind of cloth covered shield, they would then paint it with Viking / Celtic designs. This is what I intend to do once this shield is complete.
 
 So here are some of the construction processes that go into making my shield.


I did the edging the same way the Vikings would have done it, but used jute webbing instead of raw hide, as I just can not afford to buy raw hide. I feel the jute webbing looks every bit as good and as it is a sculptural art project and not going to be used for battle, I feel the jute works and looks authentic.

I have to say that putting the edging on the shield took me about 5 or 6 hours as it is made up from individual over lapping pieces that are nailed and sown on. After a few hours of working, I gradually found my rhythm when it was half way finished. Then it only took about an hour to complete the rest. 

I recon if I make this again, I will complete the edging in 1 ½ hours instead of 5 or 6.


So this photo shows the comparison between pre and post ageing. Also as you can see, I have temperately put a boss in the center of the edged shield, to give an indication what the finished piece will look like.    By the way, the two photographs were taken at different times of day and also by different cameras. 


Now all I have to do is research and create a Viking / Celtic design that I will then paint on, using natural earth colours like burnt sienna, red and orange ochre and colours that would have been available a thousand years ago.


So once again, thank you for reading my blog and I will show the completed shield in my next post.

Sunday, 6 July 2014

Viking Shield part 2

Viking Shield part 2


As I was saying in my last post, I put together the shield, laid down some basic designs, gave it a good sanding and now I am almost ready to finish the project.

I then put a new coat of the iron oxide vinegar mix and aloud it to dry and then put one more application to some of the inside panels to make them stand out more.


Once everything had dried out, I then decided to put some colour into the decoration lines. I felt the best way to do this was to mask everything off and then use some blood red spray paint I had. I really thought this would work until I ran out of the red, but I did have a small can of blue, so I kind of mixed everything up. I know that this isn’t what the Vikings would do, but as it was my contemporary version of a shield, I feel it will look ok.


After the paint affect was done, I then gave the whole thing a coat of finishing wax and the shield was almost complete. The only thing left to do was the edging. I found out that shields had a raw hide edge that was sowed or nailed on while it was still wet and flexible. As the raw hide dried out, it became taught and really hard and tough.
The only raw hide I could find was from a pet shop and although this would have been ideal, it was just way to expensive as I needed 10 or 12 and they were about €4 each.
Instead of using raw hide I decided to buy a roll of jute webbing as used in upholstery. I sourced some on Amazon.co.uk and had this within a few days. It cost about €15 for 33m, which is a fantastic price and although I only needed about 3m, I will use it for other projects.


I first of all used a staple gun to fix the jute webbing and then drilled holes all around the shield. I then used jute twine to sow the webbing onto the shield and when this was finished, I removed all the staples. I used the jute twine on the grip or handle of the shield and then wiped the iron oxide mix into all the jute, which made it look old.


So this is the finished shield. To be honest, it doesn’t look as good as the blind carving when used as a wall hanging, but I will find a place to hang it some were in the house.


I have got to say I have enjoyed doing these projects and look forward to doing a few more. I really would love to have a small workshop so I could do some complex work and maybe start cabinetmaking again.

Once again, thank you for reading my blog and please feel free to comment if you wish.